This is my last post for the Stick It Down challenge blog design team! I used this awesome sketch by my team member. 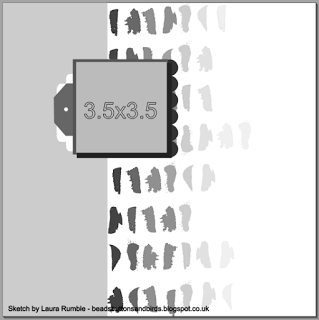 I knew I wanted to do a layout about our koi. We have a pond in our condo and these fish have been around for longer than Dylan and I have been together. They stayed for a while in their pond back in Kingston, but then moved up to Ottawa recently. Unfortunately, they have all passed away now. They lived a good long life and I wanted to commemorate that. However, I could only find 3 pictures that I took of them. We are looking forward to getting new baby fish soon, and I vow to take more pictures of them!
I started off with this perfect paper that I found in a Michael’s brand paper pad. At first I wanted to do some sort of large ombre quote with hand cut letters in a rainbow of colours, but then I saw this paper, and decided to do something different. 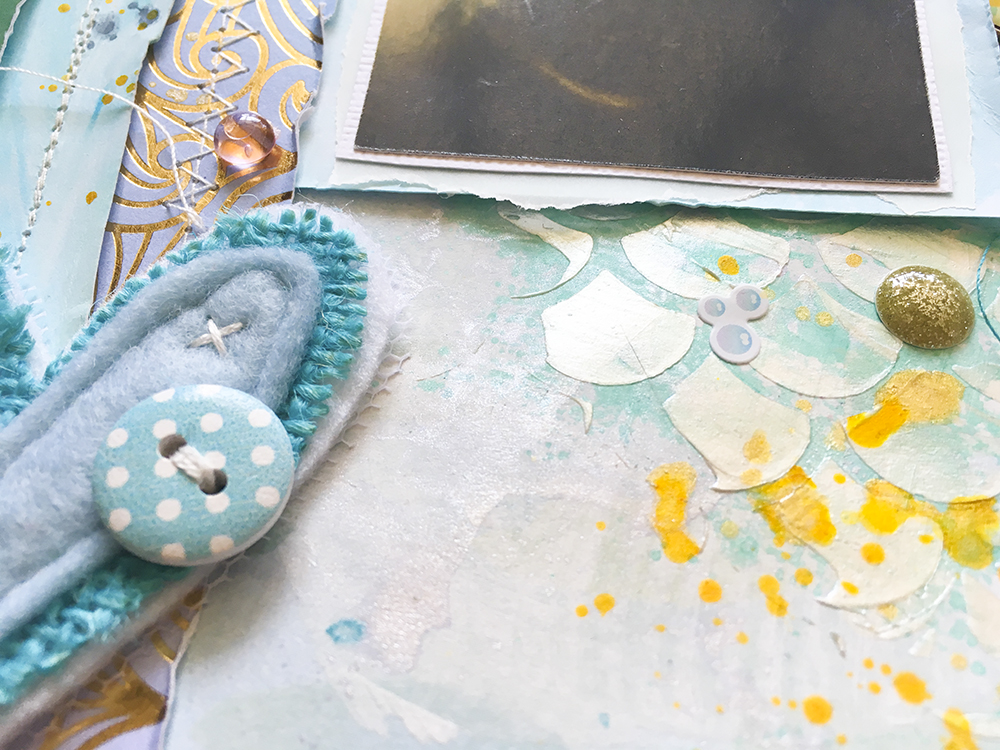
I applied some gesso to the paper and then some shimmer sprays and watercolours using the packaging technique. Once dry, I used a fish scale stencil and a palette knife to apply some white shimmer texture paste. I layered some strips of patterned paper to cover up a quote on the side of the background paper that I didn’t really want on my layout. Plus, that’s what the sketch suggested, so it worked out.

I used a strip of paint chip patterned paper from Crate Paper’s Flea Market, a strip of homemade marbled paper, and some gold patterned water and scale paper from Michael’s mermaid and unicorn line. I stitched them in place and distressed the edges. I layered some tags and stamped the date.

My focal piece (other than the photos, of course) was this gorgeous koi cut file that I got from the Silhouette Store ages ago. I got it because it was a really pretty peach watercolour inside, and I thought it was a print and cut, however, the design was just an outline. So I modified it a little bit to make it into more of a paper piecing bit. For the body, I took some peach marbled paper and splattered it with 2 shades of gold and black. For the fins, I backed that with vellum and stitched lines. I love love love how it turned out. I also added a little spot of black for the eye after it was pieced together. I popped it up on some foam under the body, but left the fins floating free. I also layered some thread underneath.
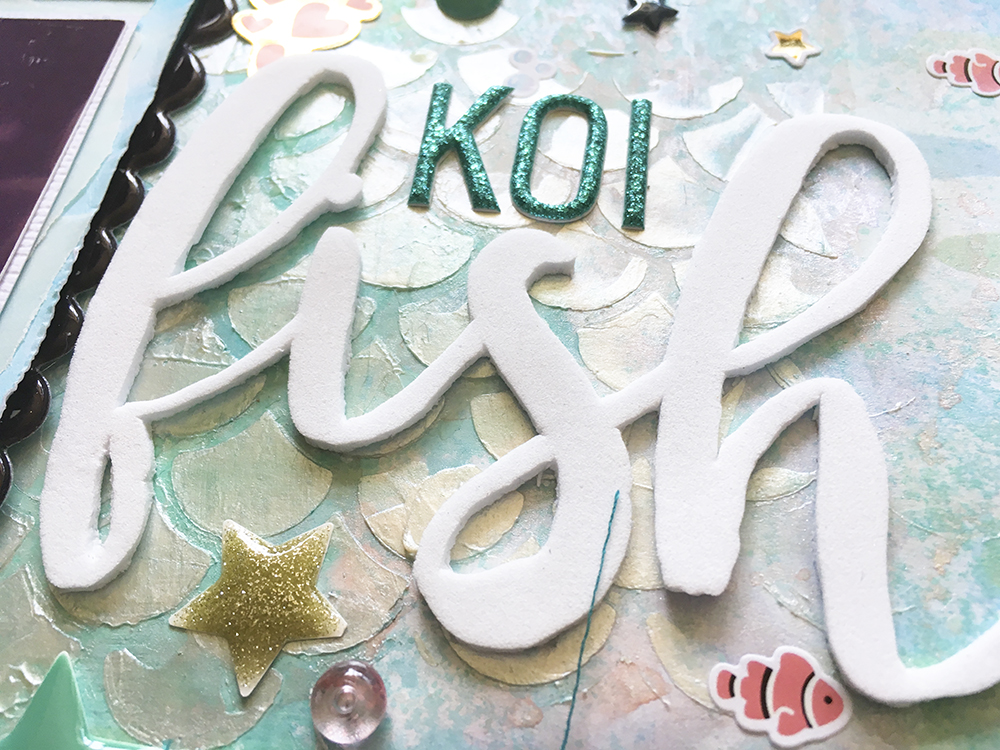
For my title, I used some Heidi Swapp teal alphas to spell out Koi, then used my Silhouette Studio software to find the perfect brush script font for the word fish. I cut it out on some white foam. I’ve always wanted to try this technique because I love the look of foam script words, but I wanted to be able to use my own fonts and words. I’ve cut foam on my Cameo before, but it was a more simple shape. It didn’t cut all the way through, but scored it deep enough that I was able to rip it out without tearing the word. It left the edged of the word a little ragged but I was able to fix it up a bit with scissors. I also tried the technique that I saw on the internet where you take the end cap off the blade to get a deeper cut, however, it ended up just shredding the foam and not finishing cuts. Overall it was better with the end cap on and ripping it out; I would NOT recommend the other way. I loved the look so much though, that I ended up ordering the deep cut blade and it is on it’s way!!
I layered my photos on white cardstock, some vellum, some marbled paper, and a black scalloped puffy sticker border from Crate Paper’s Cute Girl. It tied in the black in the koi. I embellished with some tiny fish and bubble stickers, MME’s Sugar Plum enamel stars and dots, and some clear bead dots. I used a MME fish scale brad. Oh, and I almost forgot! The felt heart that I got from one of my other team members in my secret santa package. I’ve been wanting to use it for forever, as it is adorable, but this is the first layout that I put it down and it felt right.
I”m going to miss being on the Stick it Down team, but I had to step down because I have some of my own projects that I have been wanting to work on. So stay tuned! Also, keep an eye out for the process video for this layout, on my youtube channel.
xoxo
A